
Setting up a simple one page website using Nicepage and Netlify
I’ve just set up a single page website (= online business card) for myself and my husband: https://pius.cloud/ . This post summarises what I did. If you’re looking to get started with something super quickly, then only the first two steps are essential (Creating a website and Serving a website).
Creating a website (using Nicepage)
I’ve created websites using various tools such as straight up HTML, Wordpress, Hugo+blogdown (this site - riinu.me), bootstrap, etc. Each has their strengths and weaknesses and I’m always keen on trying out new things. After a couple of quick Google searches I decided to make my next website using Nicepage. I’m using the macOS app, but it also has a Windows version and it can be used online without installing anything on your computer.
Looks like Nicepage is a relatively new website builder, founded in 2018, and at the time of writing, it only has 248 Twitter followers: https://twitter.com/NicepageApp. I’m not very active on Twitter, and I have 923. Yes, it’s a bit bizarre to quote these numbers in a blog post, but it will be cool to read this in a few years when I have 1k, and they’re at 100k. They certainly deserve it, as my experience with creating a website using Nicepage has been awesome! It’s so damn good!
What I did was:
-
Create a new blank website
- I never do this! I don’t believe in re-inventing the wheel, and I’m not a designer. I just wanted a really simple ‘business-card-like’ look that I couldn’t find in any of the templates.
-
Delete all pages except Home:

- Remove the menu, since I only have a single page. From what I can tell, the only way to remove the menu is to remove the header:

- Add a New Block split by two
- Add in image and text elements.
- I experimented with the built-in Block Designs a bit, but ended up using a Blank again. Thing is, I was trying to use the Team designs for us. But I could not figure out how to use distinct social media icons for different ‘team members’. Whenever I deleted Twitter from my husband, it also removed it from me. I failed to unlink the two profiles. Thus, I created a blank box and added the image and text elements.
- Play around with various settings for alignment. Use the Phone option to re-size the text on small screens only (works so well!), use Preview, add a Favicon (Site settings), etc. Adding a Favicon or a logo worked exceptionally well. In the past, I’ve spent a lot of time re-sizing website logos, but Nicepage will do that for you.
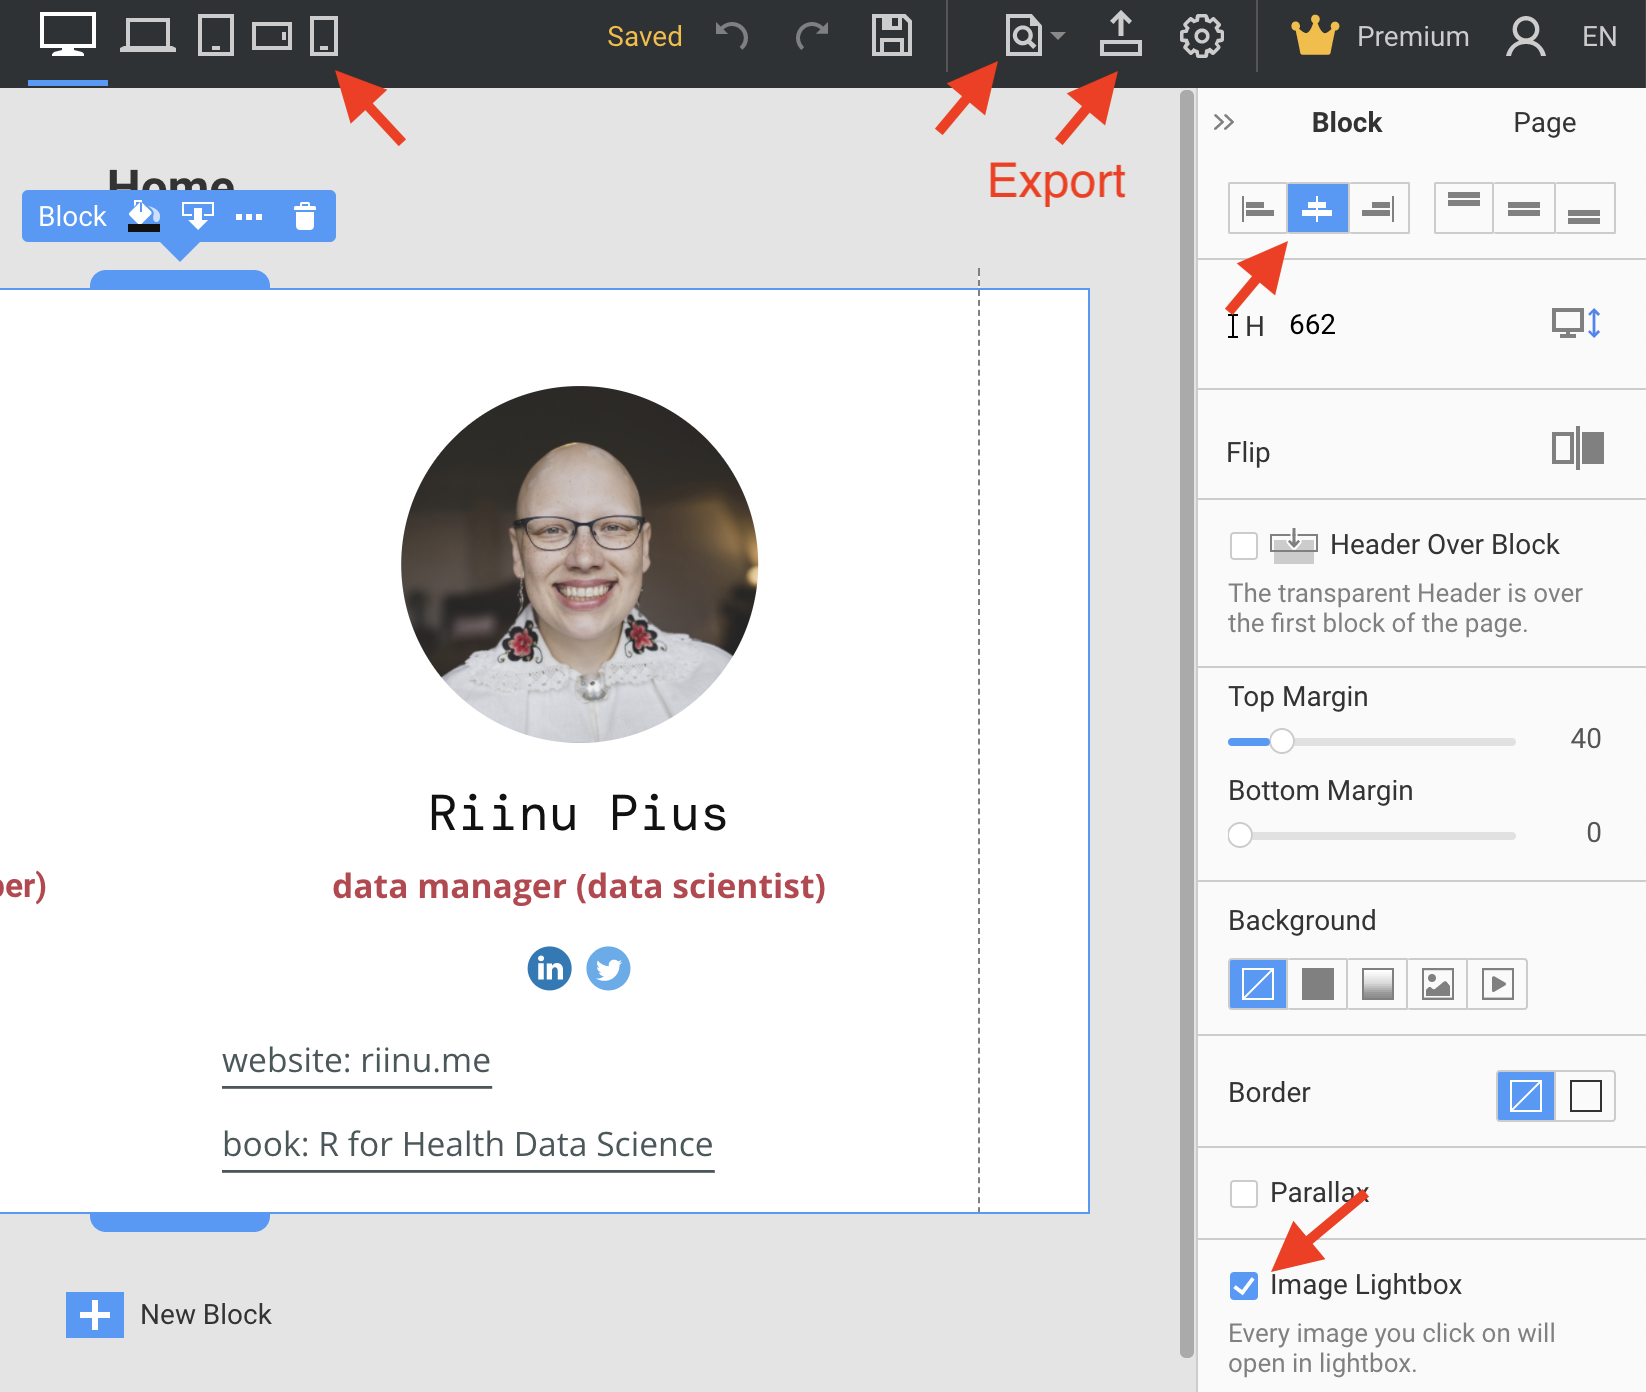
- Export to HTML.
Serving a website (using Netlify Drop)
- A convenient and fast way to publish a website is using Netlify Drop: https://app.netlify.com/drop
- You just drag and drop the folder containing your website (= your HTML export) and voila, it’s live with an automatically generated shareable link.
- This works even without creating an account/logging in. The link works for 24h, but if you create a free account you’ll be able to claim it and it will work forever. I’ve been using Netlify for years and have never had to pay them. Cheers!
- When you log in you’ll be able to change the automatically generated link (site name) to what you wish. For example I’ve just changed it to: https://riinupius.netlify.app/
If you’re happy with netlify.app trailing in your site address then that’s you done!
Updating your website: make your changes in Nicepage, export to HTML, log into Netlify, click on your site, click on Deploys (top menu), drag and drop the updated folder there.
- I found Nicepage super cool to use and didn’t experience any glitches. But I was working on a very simple single page site and can’t vouch how it would work for something more complicated.
- The free plan seems quite limited, AND I’ve just found out that when you first register it lets you use Premium features for free for 7 days. So I’ve been using Premium without realising it and I’m now wondering if/what will stop working once this passes. The already deployed version won’t be affected of course, but future edits…who knows. I’ll try and remember to report back here in 7 days.
Using your own domain name
I wanted my new website to be at pius.cloud. For this, I had to buy the domain name (pius.cloud) from a domain name registrar. Netlify also provides this service, thus the easiest way to do it is to go to your Site Settings, click on Set up custom domain, and purchase a domain name from them. This way they’ll do all the set-up for you, you just pay and click through. Custom domain names are not free, $20 per year is about right for the domain names I’ve worked with (you usually get a big discount the first year, and then it rises to $20).
My domain names are registered with Namecheap, so to keep everything in one place I bought pius.cloud with them.
In my Netlify’s Domain settings, I added pius.cloud, then scrolled to the bottom to find “Set up Netlify DNS (Domain Name System) for your site. Clicking on that gave me a list of nameservers such as dns1.p06.nsone.net, etc.
Then I had to ‘tell’ Namecheap that I’m using Netlify’s DNS for my site:

I missed that little green tick about three times, wondering why my changes hadn’t worked. Make sure to click it.
It may take up to 24h for these changes to register and your domain name to start working, but it often propagates in just a few minutes.
Optional: Updating your website with git (instead of drag-and-drop)
If you already speak git (version control software), or are keen to start using version control then Netlify is happy to grab updates from a git repository. This saves you from dragging and dropping, but it does mean you need to:
- Install git (if you haven’t used before/don’t already have it installed it on your computer).
- Create a GitHub account (or GitLab, etc.).
- Create a repository on GitHub.
- Clone the new (empty) repository to your computer. You can do this on the command line, or you can install software that interfaces git. I use GitKraken.
- Move your website files into the repository.
- Add all files (
git add .or ‘Stage all’), commit, push. - Go to Build & Deploy on Netlify (left hand menu once you’ve selected your site) and link the GitHub repository.
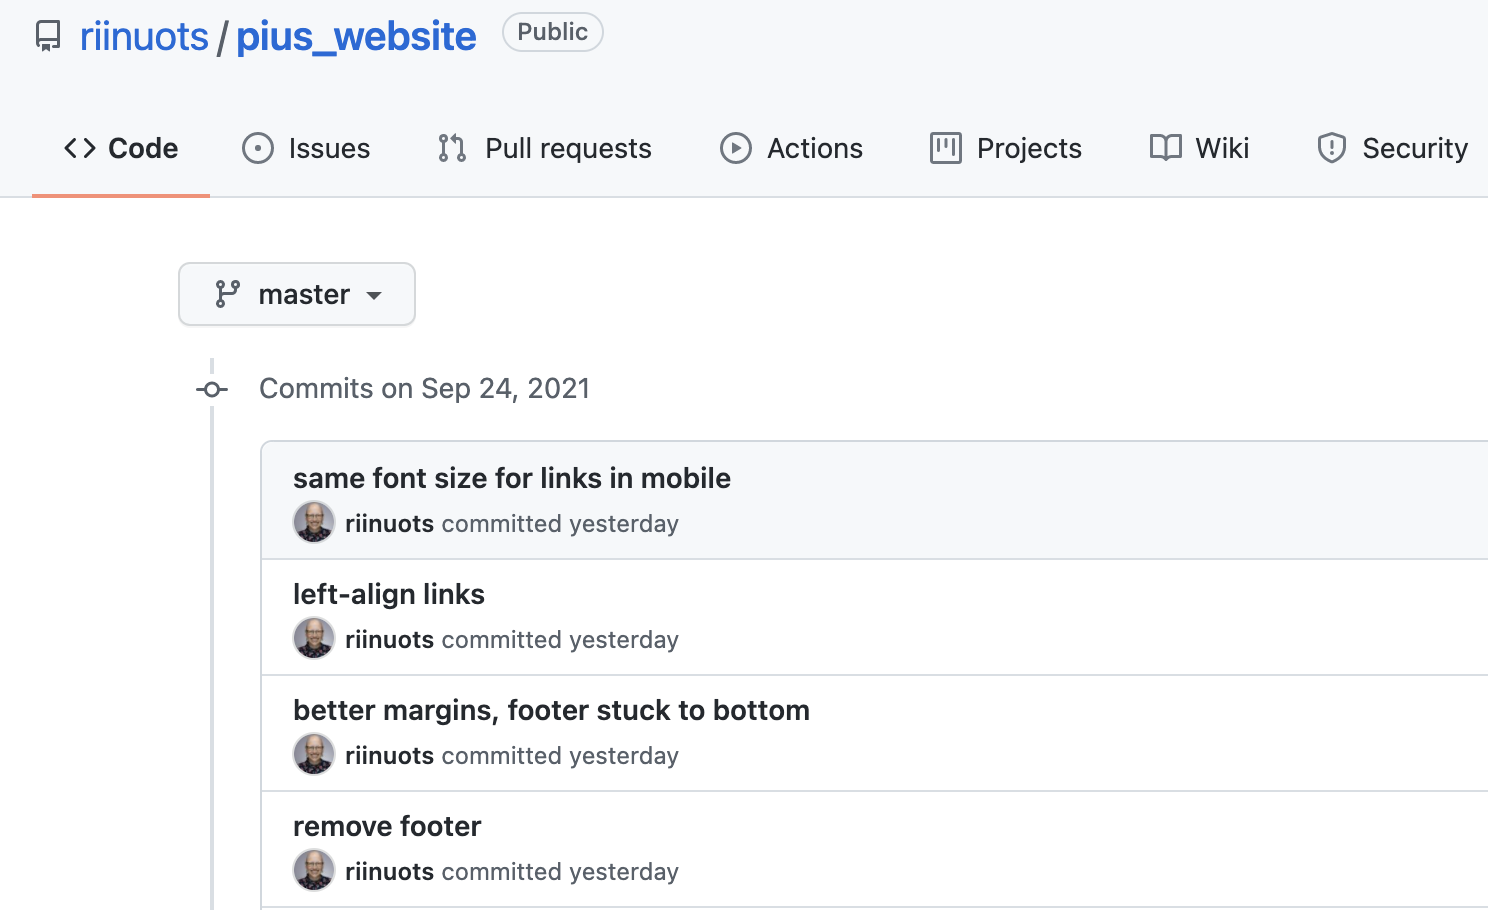
Now every time you push to that repository, Netlify updates your website automatically. It’s like magic!
Furthermore, you can look up your changes and commit messages on GitHub:
- There are a few different ways of setting up new git repositories, if you’re used to doing it differently that’s fine. No need to follow these specific instructions.
Netlify also retains all versions of your website under Site overview - Production deploys. This means you can revert back to older versions without using git/version control.
