
Creating a Quarto website served on Netlify
I’ve put together a quick ‘getting started with Quarto and Netlify and GitHub (optional) workshop’.
The instructions can be found in the blog post below, or at this website which also includes short screencasts: https://quarto-workshop.netlify.app
What is Quarto?
Quarto® is an open-source scientific and technical publishing system built on Pandoc
Colloquially known as the ‘new R Markdown’
Prerequisites
Install the latest version of RStudio Desktop on your computer (from July 2022, Quarto is included with RStudio)
Install the latest version of R on your computer
Workshop versions: R 4.2.1, RStudio 2022.07.1.
Note: Quarto can be used without R or RStudio, e.g., with VS Code. But this workshop demonstrates the use of RStudio and includes some R code.
1. Create a new Quarto website project
RStudio - New Project - New Directory - Quarto Website
Click on Render to have a look at the template.
Troubleshooting
- Error: “C:/Program is not recognised as an internal or external command, operable program or batch file.”
- Make sure the project name and parent folders have no spaces in them (only an issue on some Windows computers).
- “Quarto Website” is not listed as an option.
- Make sure your RStudio is version 2022.07.1 or greater.
2. Edit your Quarto website
- Change the theme in
_quarto.ymlto anything other than the default. - Edit the template content in
index.qmdandabout.qmd.
3. Add a page to your website
- Take a copy of an existing page, e.g.,
about.qmd. Call itpenguins.qmd. - Edit the title and content of
penguins.qmd. - Add it to
_quarto.yml.
4. Add R code to your website
- Insert a code chunk.
- Use the green +C button or
Ctrl+Alt+I/Cmd+Opt+I.
- Use the green +C button or
- Add in R code, for example:
#| eval: false
library(tidyverse)
library(palmerpenguins)

penguins %>%
  ggplot(aes(species, flipper_length_mm, fill = sex, size = body_mass_g)) +
  geom_jitter(shape = 21, colour = "grey", alpha = 0.8) +
  scale_fill_viridis_d() +
theme_bw()- Hide the R code and its warnings.
Search online for ‘quarto output options’ to copy the relevant YAML options.
Displaying code is referred to as ‘echo’.
5. Serve your website using Netlify
- Find the project and its
_sitedirectory on your computer.- The Files tab within RStudio shows you the project path. Locate this folder in File Explorer (Windows) or Finder (macOS).
- Search online for ‘netlify drop’
- Drag and drop the
_sitefolder there.
Optional: If want to keep the site for longer than 1h
Create a Netlify account (GitHub authentication is convenient). Claim the site.
Give it a better URL, e.g., yourname.netlify.app.
Site settings - General - Change site name.
FYI, custom domains, so getting rid of the trailing netlify.app cost around £20-30 per year.
6. Update your website
- Edit your website in RStudio. Click Render.
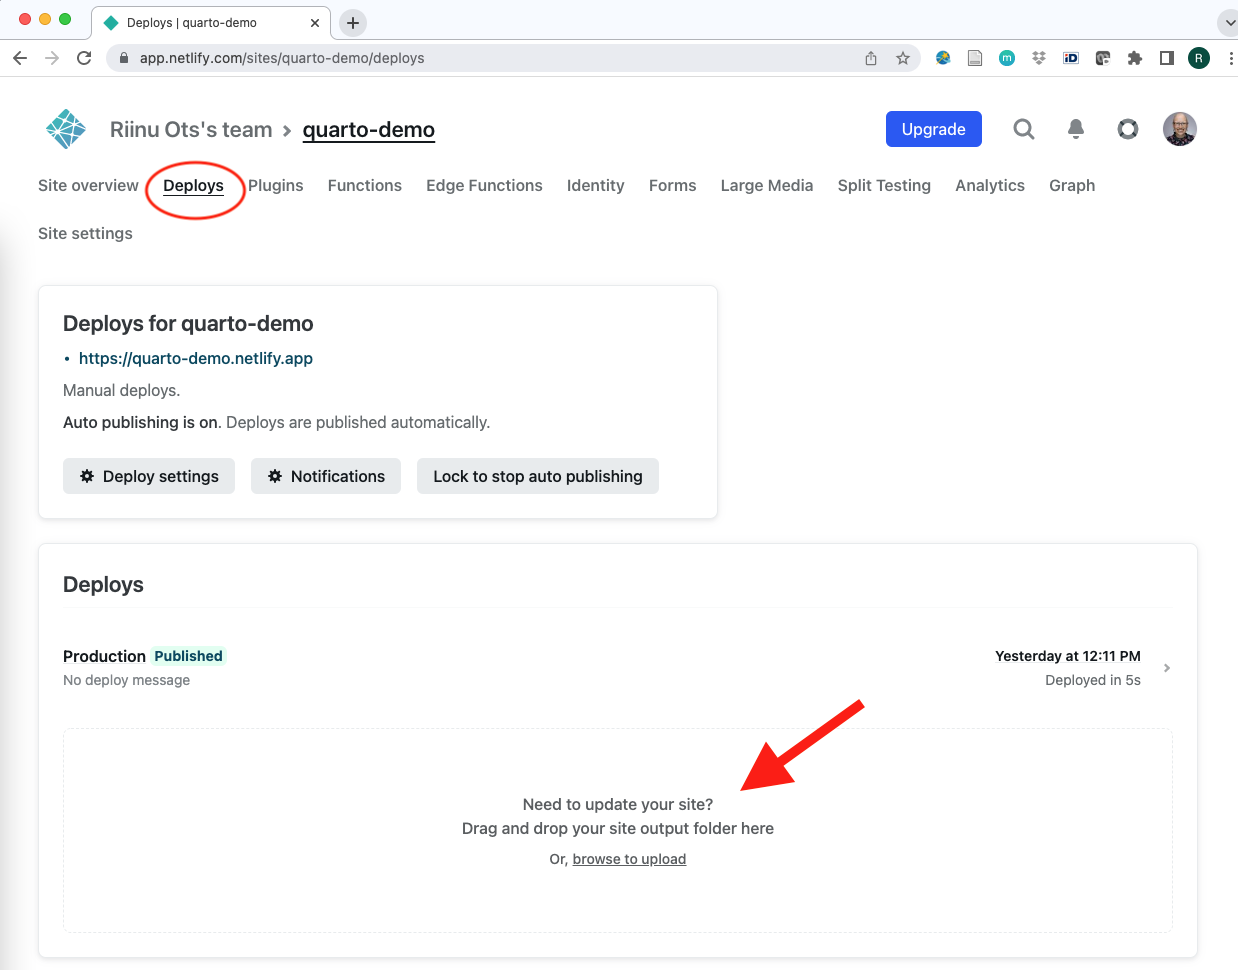
- In Netlify - Deploys - Drag and drop
_sitefolder to the update area:
Optional advanced: automatic deploys via GitHub
If this is the first time you’re using git on your computer, do these things:
Install git: https://git-scm.com/downloads
Create a GitHub account if you don’t have one already: https://github.com/
RStudio, Tools, Global Options, Git/SVN, Create SSH Key.
Copy the key over to your GitHub account Settings.
Back in RStudio, run these lines in the Shell/Terminal (also under Tools):
git config --global user.email "your@email.com"
git config --global user.name "username"
Push your Quarto website project from RStudio to GitHub. Hint: Create a new repository on GitHub first.
Make your Netlify automatically update your website when you push to GitHub.
Netlify, Site settings, Build & deploy, Link repository.
Publish directory: `_site`.
Test that it works by editing your website in RStudio, render, commit, push. Tip: for committing multiple files, `git add .` in the Terminal is convenient. It does the same thing as manually ticking everything in the Git tab.
